

There is something oddly satisfying about watering the garden on a warm British summer evening. The grass finally starts looking greener after a dry spell, the hanging baskets stop drooping, and you can almost convince yourself that the weather might stay pleasant for more than two days.
That was exactly my plan one Saturday afternoon.
I turned on the outside tap, picked up the hose pipe, and within seconds my trainers were soaked. Instead of water reaching the flower beds, a steady stream was spraying from halfway along the hose. By the time I’d walked back to the tap to switch it off, I’d managed to water the patio far more thoroughly than the plants.
If you’ve ever had the same experience, you’re certainly not alone. Hose pipes don’t usually fail dramatically. More often, they develop small leaks that waste water, reduce pressure and make everyday gardening surprisingly frustrating.
The good news is that most leaks can be fixed in minutes with inexpensive tools that many UK households either already own or can easily pick up from a local DIY shop. Even when a hose has seen several summers of use, it often has plenty of life left in it.
Why Hose Pipes Leak More Often Than People Think
Garden hoses spend their lives in fairly harsh conditions.
One week, they’re lying across warm paving slabs in full sunshine. Next, they’re left outside during heavy rain. Many are dragged over gravel, caught under wheelbarrows, or accidentally run over by cars.
British weather doesn’t help either. Seasonal temperature changes cause rubber and PVC materials to expand and contract throughout the year. Eventually, weak spots appear.
Some of the most common causes include:
- Small punctures caused by thorns or sharp stones
- Cuts from garden tools
- Split sections caused by kinks
- Loose hose connectors
- Damaged washers
- Cracks caused by winter frost
- Worn hose ends after years of connecting and disconnecting
Before reaching for a replacement, it’s worth identifying exactly where the water is escaping.
Small Hole in the Middle of the Hose
What usually causes it?
Tiny holes often appear after dragging the hose across gravel, brickwork or thorny shrubs.
At first, they might only produce a fine spray. As water pressure increases, the leak becomes much more noticeable.
Quick repair
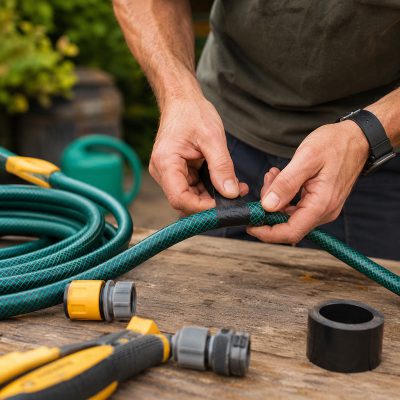
The easiest solution is a hose repair tape.
- Dry the damaged area completely.
- Wrap the tape tightly around the hole.
- Stretch the tape as you apply it.
- Overlap each layer by roughly half its width.
- Leave it for the recommended curing time if required.
Good-quality self-fusing silicone tape creates a surprisingly durable waterproof seal.
For very small pinholes, this can last for an entire gardening season.
Larger Cuts or Tears
If the hose has been sliced by a spade or secateurs, tape alone often isn’t enough.
A better option is to remove the damaged section altogether.
How to repair it
Using a sharp utility knife:
- Cut cleanly on both sides of the damaged section.
- Remove the faulty piece.
- Insert a hose repair connector.
- Tighten both ends securely.
The finished repair is usually stronger than trying to patch a large tear.
As long as the remaining hose is still in good condition, you’ll barely notice any difference.
Water Leaking from the Connector
This is probably the most common problem in UK gardens.
People often assume the connector itself is faulty when the real issue is much simpler.
Check the rubber washer first
Inside almost every hose connector is a small rubber washer.
Over time, it can:
- Flatten
- Split
- Become brittle
- Fall out completely
Replacing a washer costs very little and often fixes the leak instantly.
It’s worth keeping a small packet of spare washers in the shed.
Make Sure the Connector Is Fully Attached
Sometimes the hose hasn’t been pushed far enough into the fitting.
Other times, the locking collar hasn’t been tightened evenly.
Disconnect everything and reconnect it carefully.
Many leaks disappear after simply assembling the fitting correctly.
Hose End Keeps Popping Off
This usually happens with older hoses where the end has stretched slightly.
If the clamp can no longer grip the hose properly, water pressure forces it off.
Replacing the connector with a new hose repair fitting normally solves the problem.
Avoid overtightening metal clips, as they can damage softer hose materials.
Cracks After Winter Storage
Many gardeners don’t discover winter damage until the first warm weekend of spring.
Water trapped inside the hose freezes.
Ice expands.
Small cracks appear.
Months later, when the hose is used again, water begins escaping from several places.
If there are only one or two cracks, individual repairs may still be worthwhile.
However, if the hose has become brittle throughout its length, replacing it is usually the better long-term option.
When the Leak Isn’t Actually the Hose
Sometimes the hose is completely fine.
The leak comes from somewhere else.
Check:
- Outside tap connectors
- Threaded adaptors
- Spray gun fittings
- Hose reels
- Splitters
- Quick-connect couplings
One loose fitting can make it seem as though the hose itself has failed.
Running your hand slowly along each connection while the water is turned on usually helps locate the source.
Essential Hose Repair Tools Worth Keeping at Home
The good news is that you don’t need a huge toolbox.
A small repair kit can solve most everyday problems.
Hose Repair Connectors
Perfect for replacing damaged sections.
Simply cut out the faulty piece and reconnect both ends.
Spare Rubber Washers
Tiny, inexpensive and surprisingly useful.
Many leaks disappear after changing a worn washer.
Self-Fusing Silicone Tape
Ideal for temporary repairs and small punctures.
Unlike ordinary electrical tape, it bonds to itself to create a waterproof seal.
Jubilee Clips
Useful when securing repair connectors or reinforcing older fittings.
Choose stainless steel versions if they’ll remain outdoors.
Sharp Utility Knife
Clean cuts make repairs much easier.
Avoid using blunt scissors, which can leave uneven hose ends that don’t seal properly.
PTFE Thread Seal Tape
Useful for threaded tap adaptors where small drips appear around screw fittings.
Wrap it neatly around the thread before reconnecting.
Preventing Future Leaks
After repairing plenty of garden hoses over the years, I’ve noticed that many leaks aren’t caused by poor-quality products at all.
They’re caused by everyday habits.
Making a few small changes can dramatically extend the life of a hose.
Don’t Leave the Hose Under Pressure
Once you’ve finished watering, turn off the tap.
Then squeeze the spray gun until the remaining pressure is released.
Leaving a pressurised hose sitting in the sun puts unnecessary strain on the walls of the hose and the connectors.
Avoid Tight Kinks
Sharp bends weaken the material over time.
Instead of forcing the hose around corners, walk it into position.
If a kink appears regularly in the same place, it’s often a sign that the hose is being stored incorrectly.
Store It Properly
One mistake I used to make was simply piling the hose into a loose heap beside the shed.
It looked tidy enough at first.
By the following weekend, it had developed twists, flattened sections and awkward bends that never really disappeared.
A hose reel or wall-mounted holder keeps the hose supported evenly and makes watering much quicker next time.
Empty the Hose Before Winter
This matters more than many people realise in the UK.
Although winters aren’t as severe as in some countries, overnight frost is common.
Drain the hose completely before storing it.
Keeping it somewhere sheltered, such as a garage or shed, greatly reduces the chance of freeze damage.
Keep It Away from Sharp Edges
When watering around raised beds, gravel paths or stone walls, take an extra moment to guide the hose rather than pulling it forcefully.
Repeated abrasion is one of the biggest causes of tiny punctures.
Is It Better to Repair or Replace?
As a general rule:
Repair the hose if:
- There is one damaged section.
- The material remains flexible.
- The connectors are still in good condition.
- The leak appeared recently.
Consider replacing it if:
- There are multiple leaks.
- The hose feels stiff and brittle.
- It keeps kinking.
- Repairs are becoming more frequent than gardening itself.
Sometimes spending another ten minutes fixing an ageing hose simply delays the inevitable.
A Reliable Hose Makes Gardening Far More Enjoyable
Most hose leaks look worse than they really are. A quick inspection, a fresh washer or a simple repair connector is often all that’s needed to get everything working again before you’ve even finished your cup of tea.
Looking after your hose throughout the year also makes a noticeable difference. Proper storage, careful handling and draining it before winter can add several extra seasons to its working life.
If your current hose has reached the point where repairs no longer make sense, it may be worth investing in a new one that’s designed for regular family gardening. Home Pet Essentials offers a range of durable hose pipe products and practical watering accessories suitable for everyday use around UK gardens, helping make routine watering a little less frustrating and a lot more reliable.